[记录] 海外vps/nat 套CF配合自选IP 作者: 4usy 时间: 2021-03-28 分类: 记录 海外vps/nat 套CF配合自选IP <br/><font color="244571"> <br/>  <br/> 之前有讲过配合DNSPOD+萌精灵来使用CF的自选IP,现在发现其实有更高效的方法,是我OUT了,在此自嘲一下! <br/><br/> #开工准备 <br/> 本文章主要讲的是用http端口来配置,利用cf的worker功能反代为https使用 <br/> 1,vps或者nat一只(被Ban也可以)<br/> 2,80端口,一般vps都可以,nat可以开工单申请80端口ws链接开放(例水墨云),或者有单独IPv6的nat也可以 <br/> <br/> <br/> #CF解析工作 <br/> https://dash.cloudflare.com 进入CF的解析控制台,解析一个域名,并点亮云朵; IPv4请选A类型,IPv6请选AAAA类型: <br/> 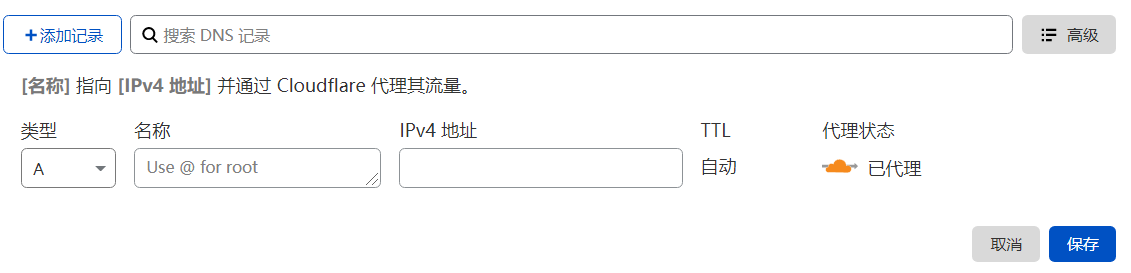 <br/><br/><br/> 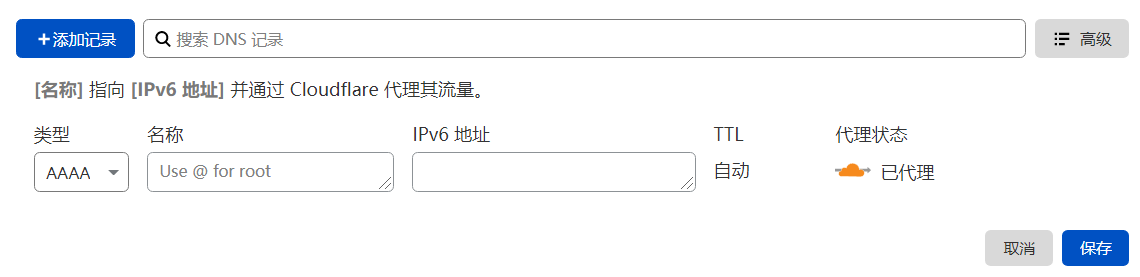 <br/><br/><br/> 解析后返回到解析控制台首页,点击右下的worker服务 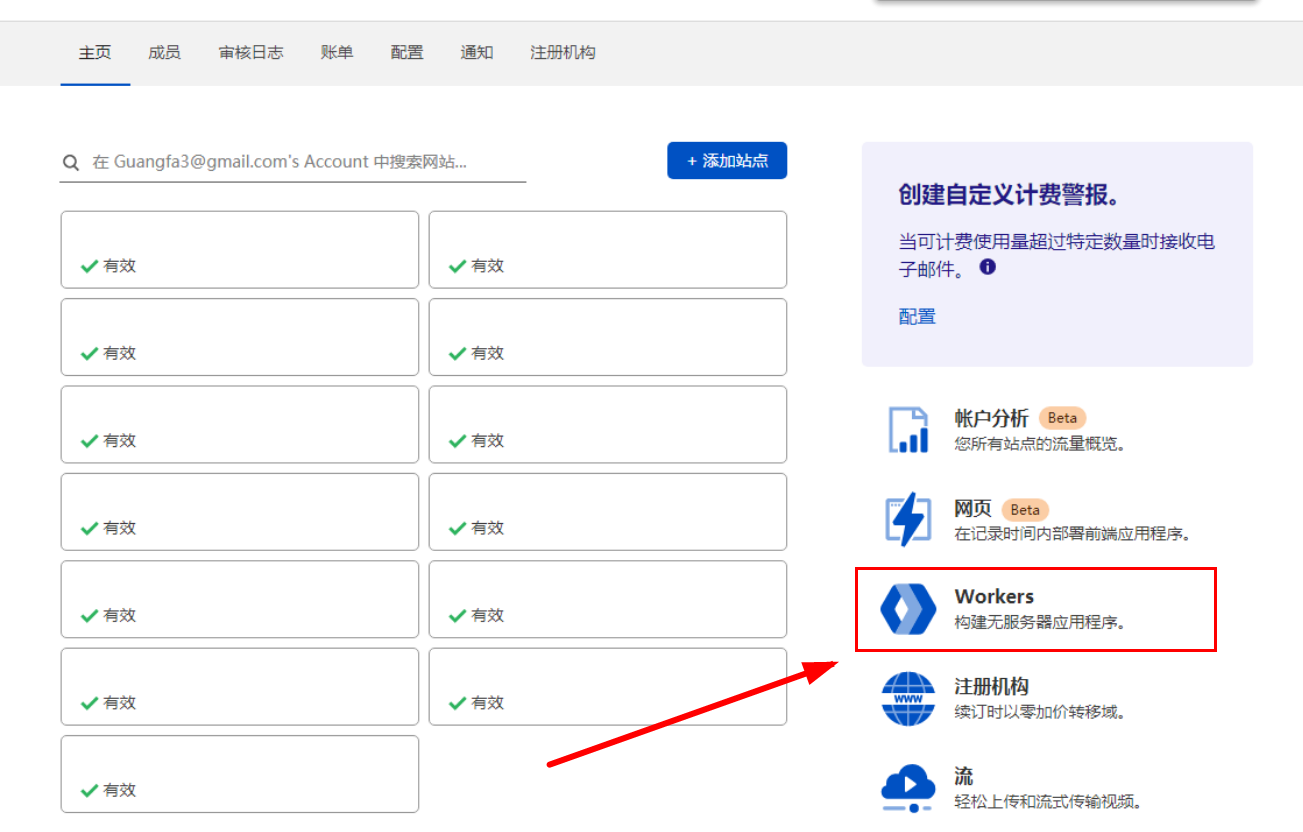 <br/><br/><br/> 首次进入worker需要创建名字,自行输入名字创建 <br/> 然后创建一个worker: 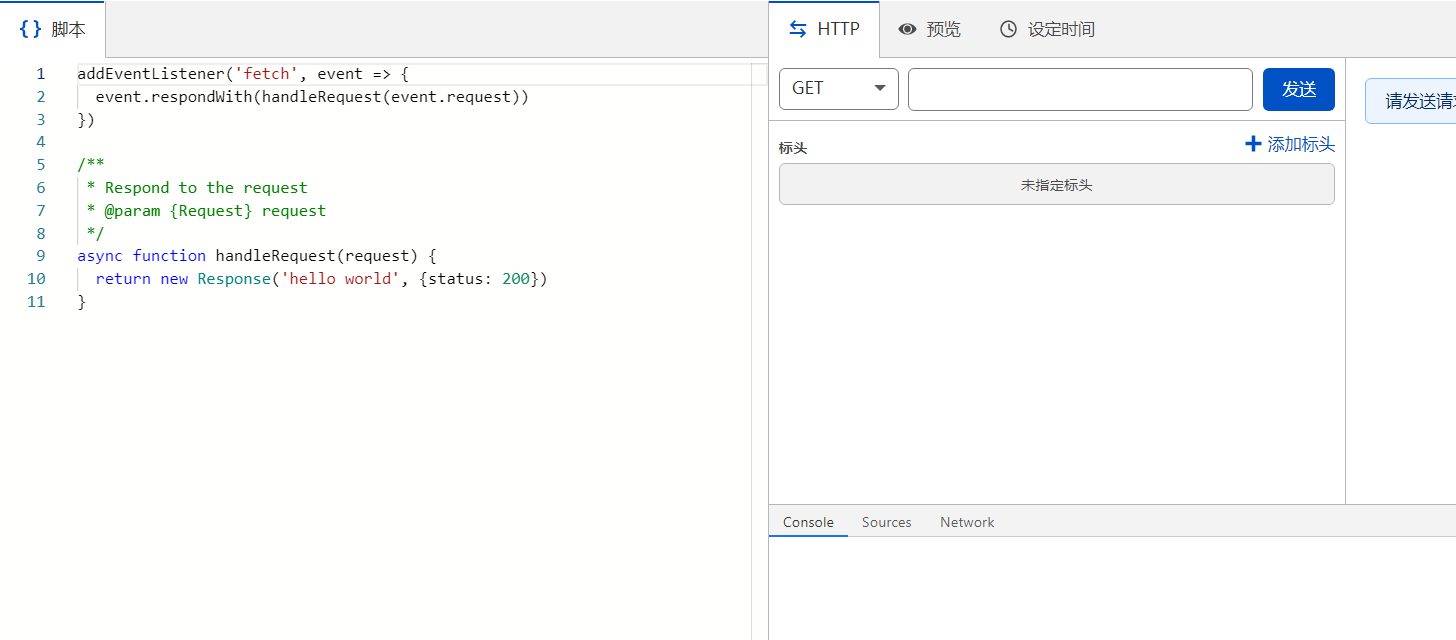<br/> 复制以下代码粘贴至左侧文本框: ``` addEventListener( "fetch", event => { let url = new URL(event.request.url); url.hostname = "test.test.comm"; url.protocol = "http"; let request = new Request(url, event.request); event.respondWith( fetch(request) ) } ) ``` 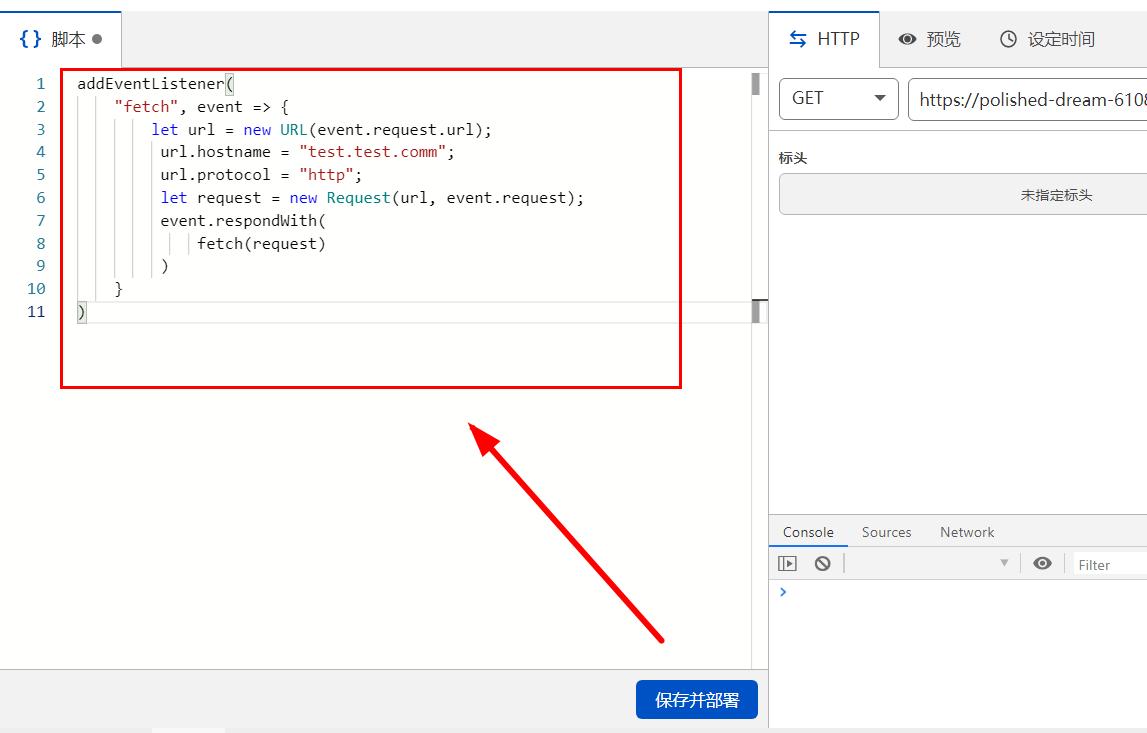<br/> 将第四行的`test.test.com`修改为第一步中你点亮云朵解析的域名; <br/><br/><br/> 然后点击发送,再点击保存并部署; 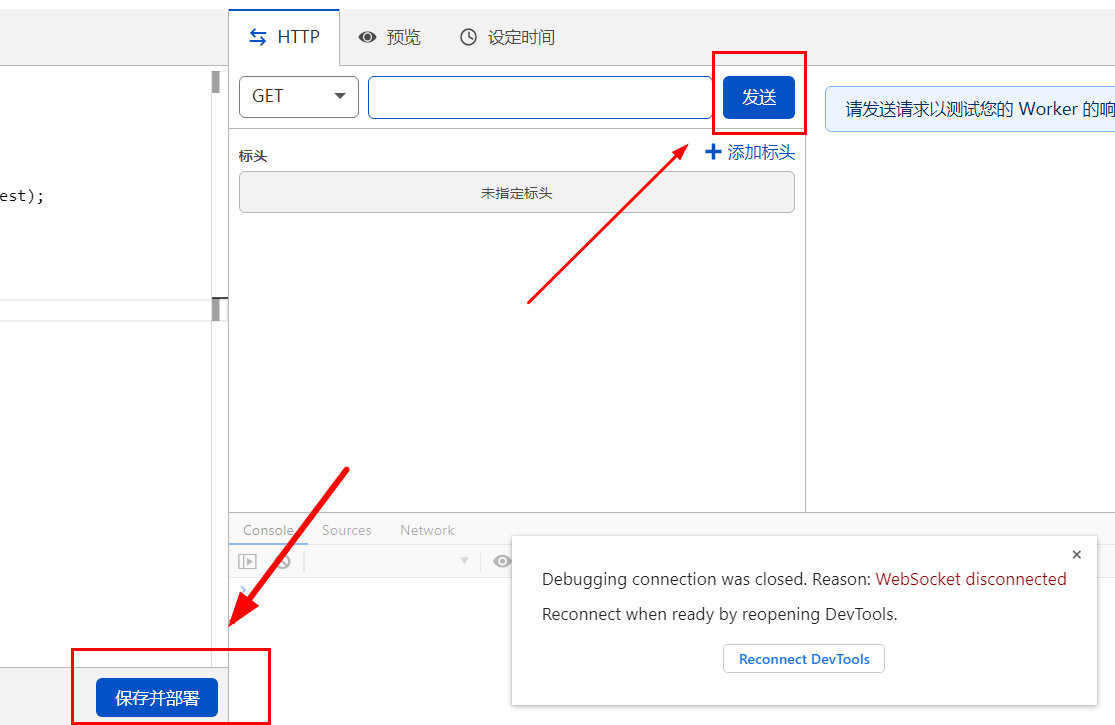<br/> 点击发送会返回错误,可以无视,保存部署后,返回worker界面,会发现已经创建成功,复制worker的网址栏(dev结尾): <br/> 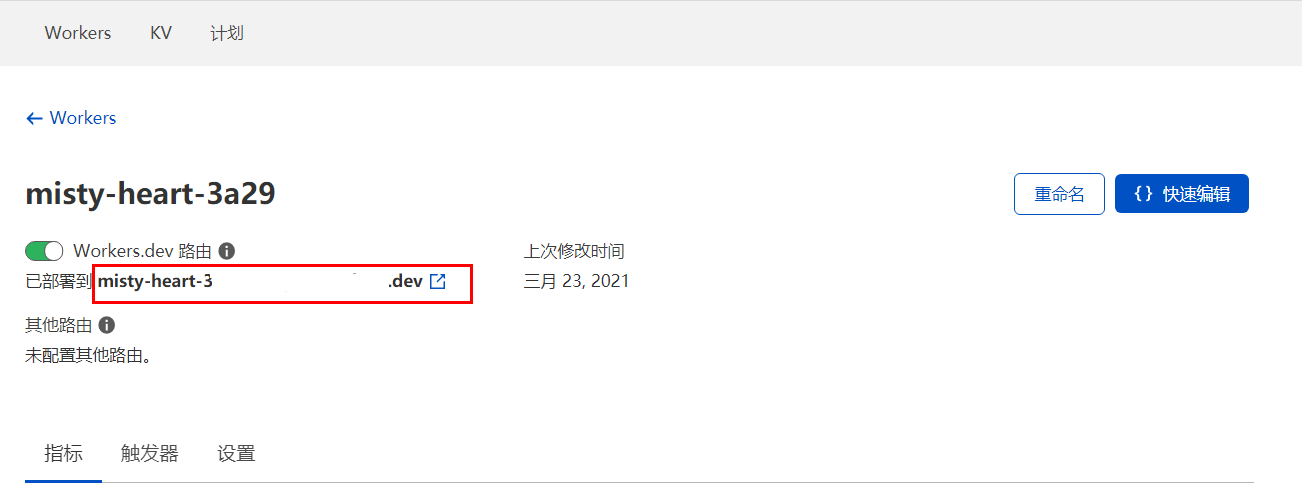 <br/><br/><br/> #配置信息 <br/> 接下来自行在vps/nat上配置一个80端口的ws,(可使用v2-ui或者各种一键脚本) <br/> 配置好80端口的ws,添加至本地客户端,修改信息(如下图): <br/> 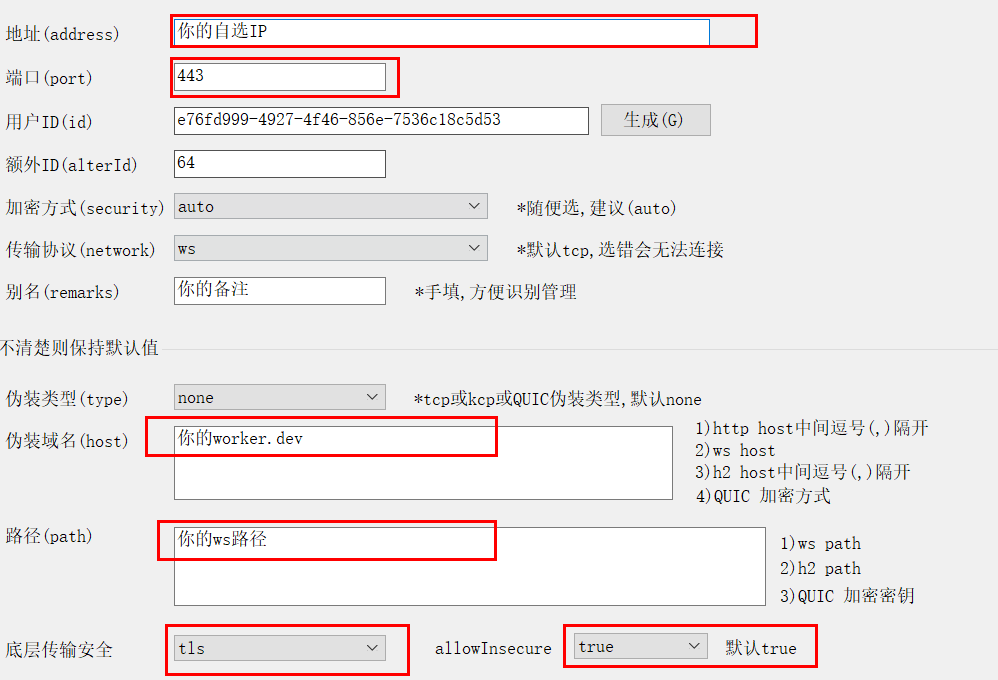<br/> 地址修改为你自选的CF-IP,端口改为443,host输入上一步复制的的dev地址,tls打开,即可; <br/><br/><br/><br/> #相关: <br/><br/> [Cloudflare自选IP工具 win/linux](https://github.com/XIU2/CloudflareSpeedTest "Cloudflare自选IP工具 win/linux")<br/><br/> [NAT拉CF小鸡教程 简单版](https://twovps.org/archives/947/ "NAT拉CF小鸡教程 简单版") 促销: 暂无提醒: 本博主因不使用Paypal付款被跑路累计26次,建议用Paypal上车